|
Contents Member Sign in |
Extracting CD Audio with CDexThe following instructions walk you through the process of extracting audio from a CD (also called "ripping" the audio). You perform the extraction during the standard sermon upload process. The following procedure presumes that you have already downloaded and installed the Sermon Publisher. Though the procedure is fairly simple, we recommend you read it in its entirety before starting it. If you need help with any of these steps, just sign in to the Site Manager and open a Support Ticket
A. Preliminary StepsBegin the standard download procedure as outlined below. A-1. Start the Sermon PublisherOn the Sermon Publisher Logon screen, enter your account name and password and click the Logon button. The initial Sermon Publisher screen appears. A-2. Begin the Add Sermon process.Click the Add Sermon button at the bottom of the Sermon Publisher screen. 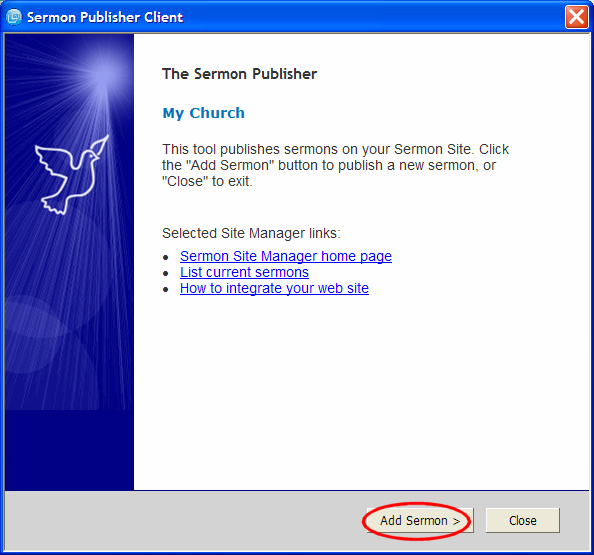 The Sermon Information window appears. 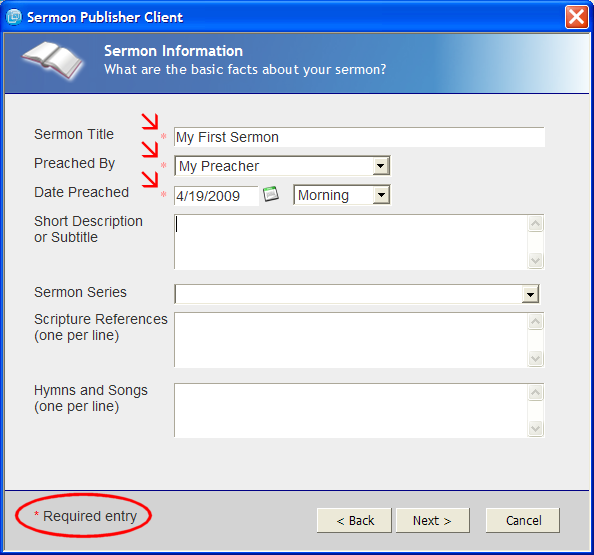 A-3. Enter descriptive information.(a) In the Sermon Information window, enter the Sermon Title, Speaker, and Date (all required). (b) Enter any additional desired information (optional). (c) Click the Next> button at the bottom of the screen. The Sermon Attachment and Notes window appears. A-4. Attach files and notesIn the Sermon Attachment and Notes window, add any desired notes and attach any documents you want associated with the sermon (all optional), and click the Next> button. The Sermon Multimedia screen appears. (Note: It's appearance varies depending on the selection in the first field.) You're now ready to extract the sermon audio from your CD!
B. Running the CDex ProgramThe helper application which extracts CD audio is called CDex. It creates a copy of the audio in a format called a .WAV (pronounced "wave") file. The following directions step you through the use of this program. B-1. Insert the CDIf you have not already done so, insert the sermon CD into the disk drive. B-2. Set Audio SourceUsing the drop-down box at the top of the Sermon Multimedia window, set the source of your sermon audio/video to On an audio CD. (Use the arrow button circled on the following diagram to display the choices of sermon sources.) 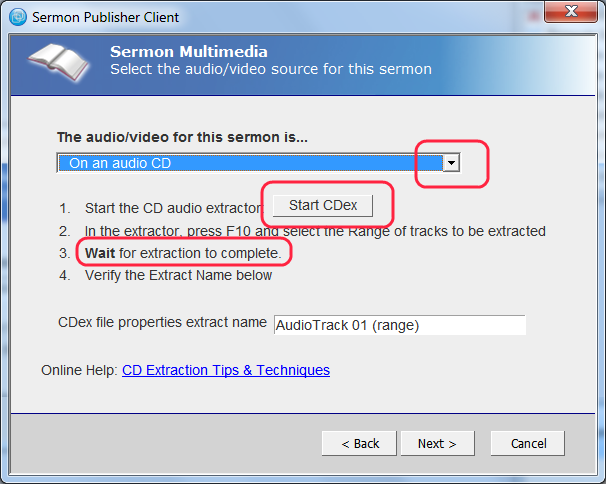 B-3. Start CDexClick the Start CDEx button (located just below the sermon source drop-down box). Note: On some versions of Windows, the first time you use CDex you will see the following warning message about a driver; click the Yes button to continue. 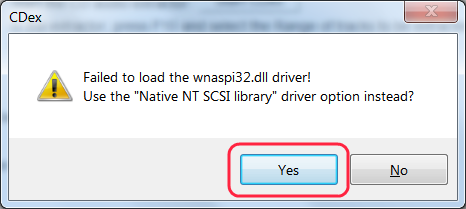 The CDex program window is displayed. 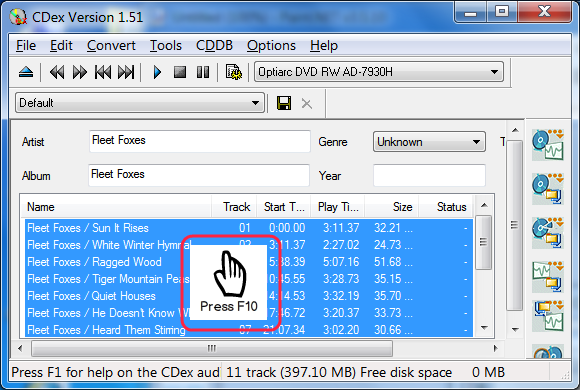 When CDex starts, it lists all of the audio tracks on the CD. In the above example, several tracks are displayed. Typically, you will have only one track. Note: This is the point in the process where you can set the advanced configuration settings described at the end of this procedure. If this is your first time using CDex, we recommend continuing with step B-4 this time, and making advanced settings at another time. B-4. Specify the tracks to be extracted.(a) Press the F10 key on your computer�s keyboard. Note: On some computers, you must press the Fn (function) key and the F10 key simultaneously to invoke the F10 function. The Record partial tracks dialog box is displayed. 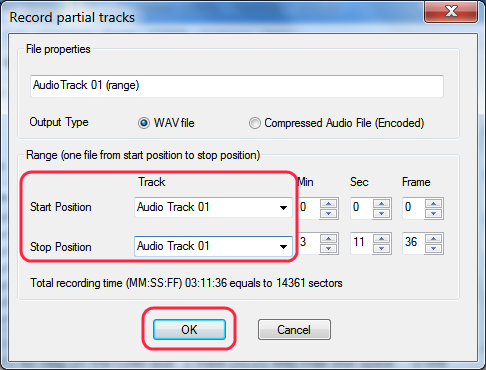 (b) Make sure the File Properties title is the exact phrase, "Audio Track 01 (range)". (c) If there is only one track on the CD, simply click OK to start the extraction process. (d) If there is more than one track on the CD, select the one you wish to publish as a sermon by setting the Start Position and End Position fields to that track number, as shown in the large circled section of the previous illustration. (e) Click the OK button. The Extracting CD Tracks window appears. WAIT for the extraction to complete. 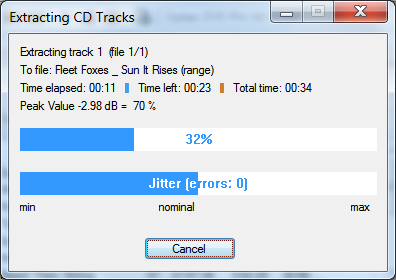 (f) When the process completes, the Extracting CD Tracks window disappears, and you are back at the CDex program window. CDex has now created a .WAV file of the CD audio track you specified. (g) Close the CDex window (click the Close (X) button in the window's top left corner). This returns you to the Sermon Publisher.
C. Final StepsC-1. Confirm file properties match.Once you are back at the Sermon Publisher window, make sure the CDex file properties extract name shown there exactly matches the name from the CDex extraction dialog: "Audio Track 01 (range)". 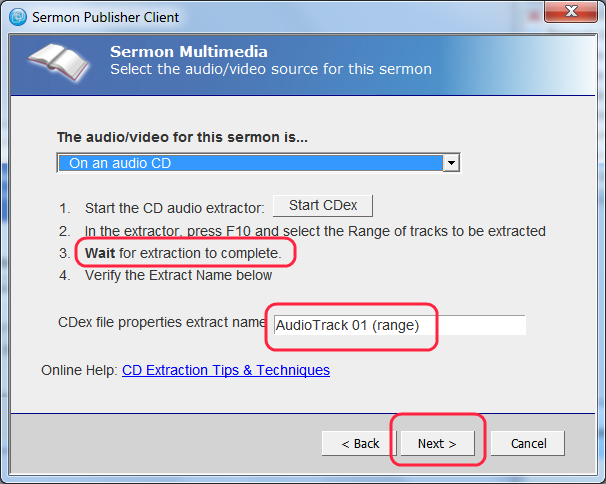 C-2. Continue with the publishing wizard.Click the Next button. Sermon Publisher now does two things: First, it converts the extracted file from .WAV format to the audio format specified in your Account Settings page on the Sermons Online website. Second, it uploads the converted file to your web page. C-3. Repeating or completing the process.If you have more sermon audio files to extract from this CD, repeat the above process from step A-2, being sure to select the appropriate track in step B-4(c). Otherwise, remove the disk from your disk drive and store it appropriately.
Advanced StepsConfiguration TipsHere are some tips on configuring CDex for the best performance. You can set these preferences any time you use CDex, but you only have to set them once. CDex will remember and use them until/unless you change them again. A good time to set them is just before step B-4, above.
CONFIG-1. Open the CDex configuration dialog box. (a) Just before you begin step B-4, above, open the Options menu and select Settings. The CDex configuration dialog box is displayed. (b) In the CDex configuration dialog box, select the CD Drive tab. 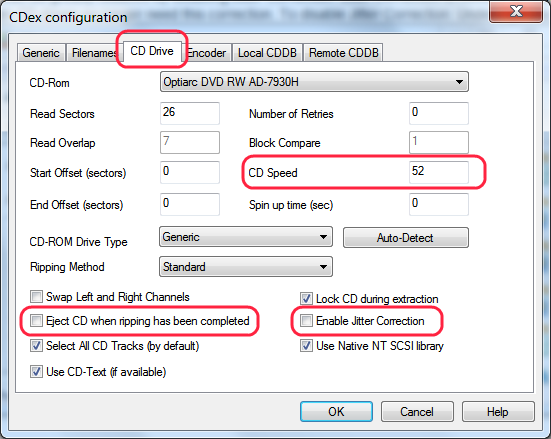 CONFIG-2. Set the configuration options. (a) To match CDex with the actual speed of your CD drive, enter the speed in the CD Speed input field. (b) To instruct CDex to automatically eject your CD when the sermon audio file extraction process has completed, check Eject CD when ripping has been completed. (c) To disable Jitter Correction, uncheck Enable Jitter Correction. (d) Click the OK button. The dialog box closes, and you see the main CDex program window again. CONFIG-3. Continue the extraction process with Step B-4. Once you have made the changes to the CDex configuration settings, perform the rest of the CDex procedure as normal, picking up with Step B-4, above. Notes:
|